![]()
![]()
|
|
|
|
|
||||||||
|
|
||||||||
|
|
||||||||
|
 |
||||||||
|
Getting
Started Windows Release
Notes |
Getting Started You do NOT have to restart your machine after installation of Spam Spade. Initial Setup Before launching Spam Spade for the first time you should have:
Launch Spam Spade. Spam Spade runs for one (1) hour periods in Trial mode. You should, however, enter your registration information immediately after proceeding through the initial setup screens. The initial setup process consists of five dialog boxes. The first dialog box is simply an introductory screen. The second dialog box requests that you "Get Email Trash File". Click this button an navigate your hard drive until you find your email application's Trash file. Once found, click the "Open" button. Spam Spade will then record this location (and display the full path name in the dialog box): 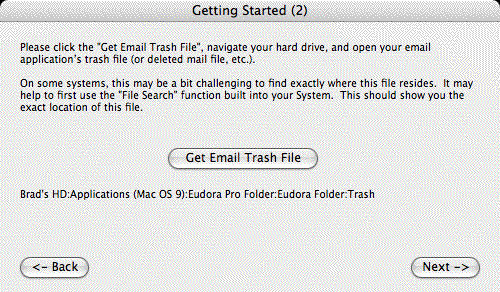 Click the "Next" button to proceed. You then click the "Get Email Temp File" to locate your email application's "Temp" file. You should have previously created this file (mailbox) using your email application (if not, you can skip this step and manually set this path later). Similar to what you did previously, navigate your hard drive and open your email app's "Temp" file (mailbox). Once found, click the "Open" button. Spam Spade will then record this location (and display the full path name in the dialog box): 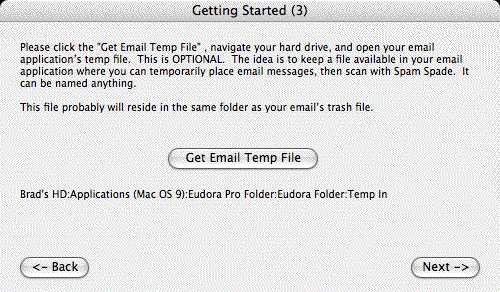 Click the "Next" button to proceed. You now must enter a phrase which uniquely identifies your incoming email server. IF you had any spam (or other email) in your Trash email folder, Spam Spade most likely automatically identified this phrase and filled in the edit box. If this is not the case, then you will need to manually inspect the headers of your incoming email messages and enter this phrase: 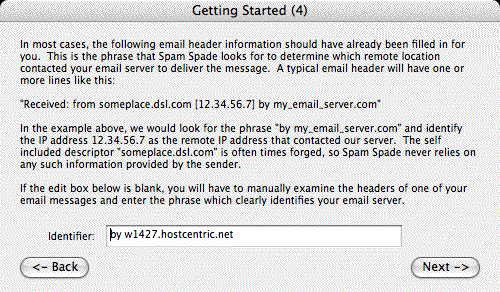 Click the "Next" button to proceed. You now enter your email address and smtp server (your ISP's mail delivery server): 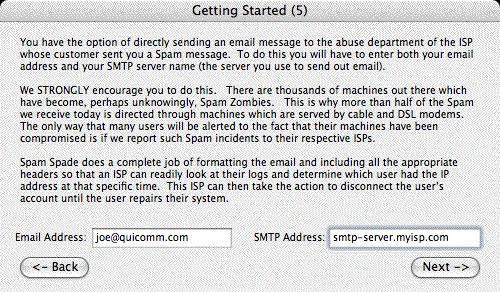 You need to enter this information in order to send detailed messages to spammer's ISPs informing them that one or more of their customers are sending out spam. Spam Spade completely formats the message to the ISP, including all email headers, so that the user who delivered the spam can be positively identified. The message is then directly sent from Spam Spade to this user's ISP. Click the "Next" button to proceed. That's it. You have now initialized Spam Spade. Click the "Finish" button to close the remaining dialog box. After clicking the "Finish" button, Spam Spade will lookup your current IP address and display it on the map. Should you need to add/change any of these entries, you can do so through the "Settings" window. How to use Spam Spade: 1. Plotting the location of any IP address Enter the IP address in the IP edit box. Click the "Show Location" button. Spam Spade will plot the location, and display ISP information for this specific IP address. If no lat/long data is available for this IP address, Spam Spade plots the location at 0 degrees north, 0 degrees west. ISP information may still be displayed. 2. Scanning all email messages in your email's Trash mailbox. Click the "Trash" button. Spam Spade will process each message in this mailbox and plot the location from where the message was delivered to your POP mail server. 3. Scanning all email messages in your email's Temp mailbox. Click the "Temp" button. Spam Spade will process each message in this mailbox and plot the location from where the message was delivered to your POP mail server. After plotting this data, you can drag out a rectangle over the map in order to list message information in more detail (pertaining to this geographic region). This can often help you identify valid email messages from spam, and also help identify colleagues, friends and/or family members machines which may have become infected with worms and viruses and may be sending out messages as you (or others). After dragging out a rectangle over a specific geographic region of interest, click the "List" button. You will be presented with a list of all email messages which have been plotted and fall within this geographic area: 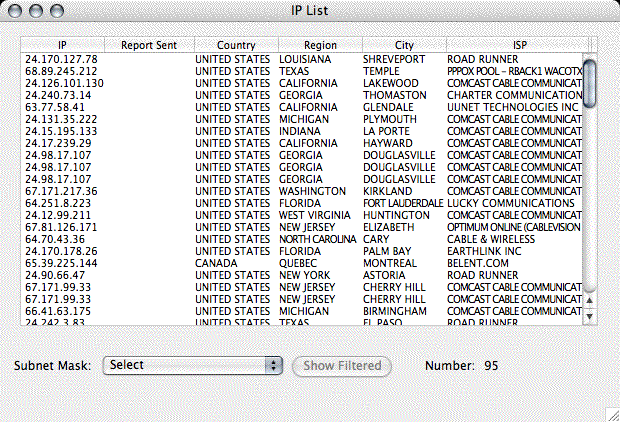 You can highlight the location of any IP address by simply double clicking an IP address in the IP column. The list will move to the background, the location will be highlighted on the map (by a flashing red circle), and the list will automatically reappear after two seconds. The "Subnet Mask" popup menu and "Show Filtered" options are for advanced users who run their own routers and/or email servers. Often the question is asked: "if I create an IP filter which blocks this IP address, and an entire 16 bit (Class B) subnet which encompasses this IP address, which other users might I also be filtering out?". Spam Spade can quickly give you the answer to this question. In this way users can readily create firewall filters which keep the bad guys out, but allow wanted traffic to proceed. You can display the details of any message, including the email headers. by double clicking any other column in the list. This will display the Email Details window: 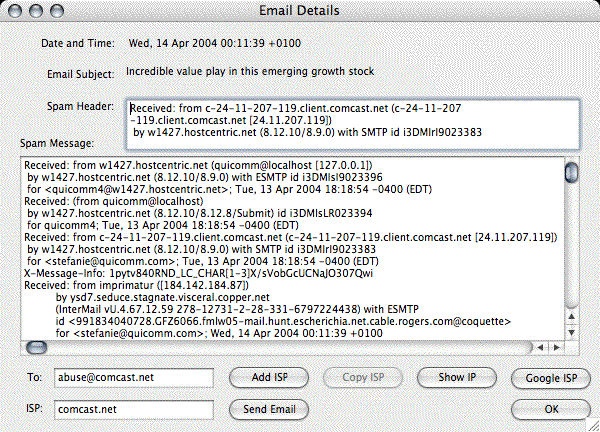 IF you hold down the "Shift" key on your keyboard while double clicking any message in the List, the Email details window will open and all Hex characters embedded in the email message will be replaced with their ASCII characters. In this manner you can easily identify the true servers and URLs involved in spam. From the Email Details window you can read the contents of the entire email message, including email headers and send this message on to the ISP responsible for this customer. Notes: Spam Spade keeps of list of ISPs and their abuse email addresses in the text file named "spam_isp_addresses.txt". This is just a text file, and can be manually edited with any text editor (including NotePad). You can easily add ISPs and their abuse email addresses by simply copying and pasting the ISP domain name in the ISP edit box, entering their abuse email address in the "To" edit box, and clicking the "Add ISP" button. Then, the next time that Spam Spade sees a message delivered from a customer of one of these ISPs (as determined by the email header), Spam Spade will automatically fill in this information (ISP and To: address). In this manner, you can simply click the "Send Email" button to forward the spam to the appropriate ISP. The message which is sent to the ISP is contained in the text file named: "spam_report.txt". You can edit this message as desired (initially you should at least replace "Your Name" with your name as you wish it to appear in the email message to the ISP). The capitalized variables:
should be used in your message since they will be replaced with actual data from the spammers email message. To make the identification of ISPs even easier, you can just highlight the ISP's domain in the Spam Header (e.g. "attbi.com" in the above example), and the Copy ISP button will become enabled. Click the "Copy ISP" button and the ISP and To: edit fields will be automatically filled in. You can also show the location of ANY IP address in an email message by: - clicking the cursor in the middle of an IP address (anywhere in the IP address...you do NOT have to select the IP address, just click the cursor in the IP address). - click the "Show IP" button. This will bring the map to the foreground, highlight the location of the IP address, and then after two seconds restore the Email Details and List windows. You can obtain more information about an ISP and spam reporting by clicking the "Google ISP" button. This will submit a search to Google regarding this ISP and display the results in your browser. After sending out an email message to a spammer's ISP, the message will be marked in the "Report Sent" column of the List.
|